So you want to be a SOC Analyst on your new Mac
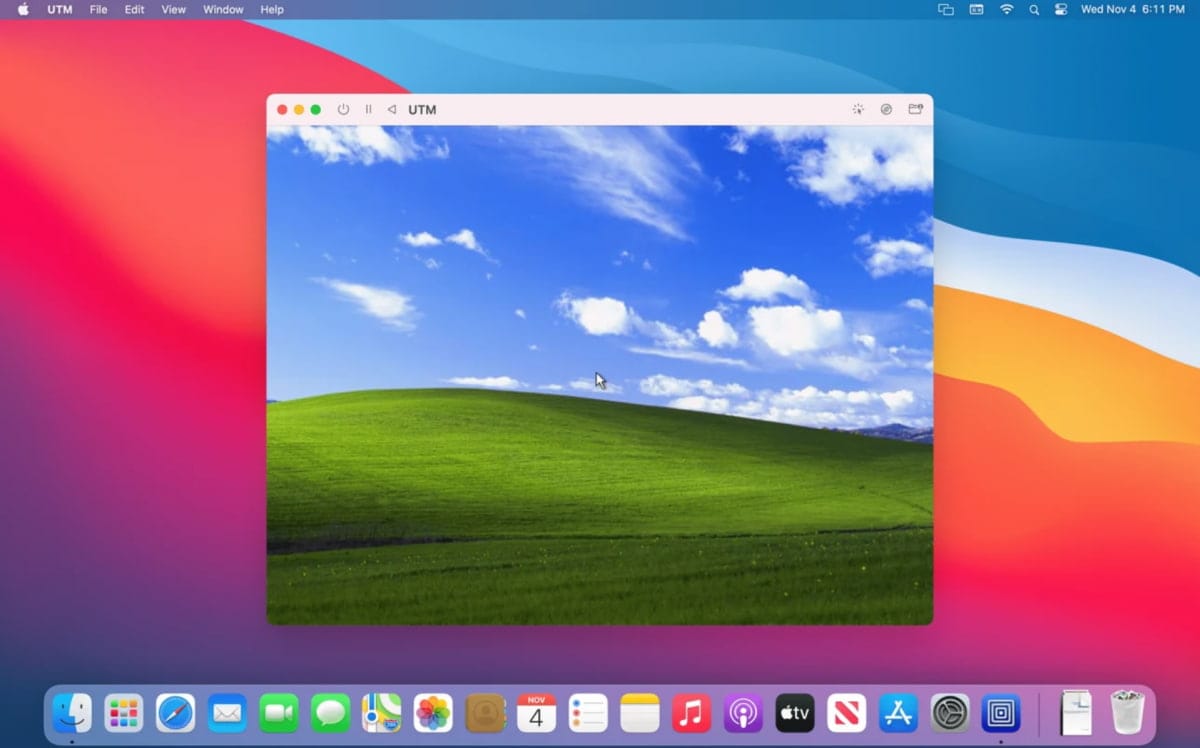
So you want to be a SOC Analyst on your new Mac
https://blog.ecapuano.com/p/so-you-want-to-be-a-soc-analyst-intro
Right now I'm exploring different avenues for working in tech, and in trying to find out about cybersecurity I came across Eric Capuano's excellent "So you want to be a SOC Analyst?" on Substack. The blog series promises a quick practical introduction into the use of cybersecurity tools. Cool!
Well, not so fast. working from my shiny new Macbook Pro with M1 processor, I stumbled at the first hurdle. "Set up a small virtualization environment." He said.
Not a problem, I thought. I ran plenty of VMs on my old mac with Virtualbox, lets go.
Well, as it turns out, the shift from x86_64 to aarch64 makes things challenging in… sometimes unpredictable ways.
Thankfully as of Windows 11, their x86_64 translation layer takes care of most of the issues, but it does seem to choke on some of the programs in use here, and I had to source arm64 versions. Unfortunately in terms of setup this means Eric's excellent instructions can't be followed beat for beat.
I did eventually get his demonstration working on my machine. Here's an adapted version of his "So you want to be a SOC Analyst? Part 1" instructions, including setup VM environment and the strange problems I ran in to.
Set up your virtual environment
- Download and install a free trial of VMware Workstation
- Download and deploy a free Windows VM directly from Microsoft.
Ah.
So already, I've fallen at the first hurdle. VMware Workstation isn't available for MacOS.
This guide is aimed at Windows users first and foremost. Fair enough. Not a problem. We can create our own VMs in UTM and install Windows the old fashioned way. After that, we can set up Ubuntu Server too.
UTM.app is the premier option for virtualisation in the brave new world of "Apple Silicon" macs. A brilliant apple-specific frontend for QEMU, it supports both virtualisation of aarch64 operating systems and emulation of other instruction sets, like x86_64, though the latter incurs a significant performance penalty. There is even a gallery of pre-built images available for download from their website. It still doesn't have some standard Virtualisation features, like snapshots, but it's very much a work in progress, it's open source, and despite the not-for-profit model, it is a real heavyweight in the scene.
For this project, we need two VMs, one windows, one linux, to allow communication between the VMs. In the interest of performance (and the assumption that everything would just work), go ahead ahead and downloaded the arm64 releases of Windows 11 and Ubuntu Server using the instructions below.
Download and Install UTM
This is available for free at https://mac.getutm.app/
Or you can pay £9,99 in the Mac App Store.
You choice!
Windows 11 VM
This is relatively straightfoward, but has a surprising number of steps, and takes a little while, a lot of which involves downloading / installing updates.
We will generate a Windows install ISO, install it to a UTM virtual machine, and then perform registry edits to disable some security features for the exercise.
NB - DO NOT go and download the most recent version of windows from UUP dump. Creating the install iso on macOS will fail silently, and you'll be left with a working ISO which installs a broken version of Windows. [1]
We will be referring to the UTM instructions as a guide.
Follow the instructions here, referring to the UTM guide as needed.
1. Download Windows
The first step is to download the installer ISO from UUPdump per the UTM instructions
But with Windows 11 you dont actually get a straight ISO. You get a list of windows UUP packages to download direct from Microsoft, and a script which stitches it all together into a bootable .ISO file, including recent updates in the process. Neat!
Prerequisites.
To build the Windows ISO on macOS we need to install a few additional packages. The easiest way to do this is through the homebrew package manager.
If you don't already have it, go to brew.sh, follow the instructions there to install homebrew.
Then run:
brew tap sidneys/homebrew
brew install cabextract wimlib cdrtools sidneys/homebrew/chntpw
Okay, now we can get to business.
ISO Creation
IMPORTANT
You'll need to download the last release of Windows 11 21H2 arm64 from here
This is the last version of Windows 11 you can build without access to a Windows PC. Why?
Trying to create an ISO for a later version of needs to be done on Windows. Trying it on MacOS will silently fail, resulting in a working ISO which installs a damaged deployment of windows [1:1]
You'll want to select Windows 11 Pro edition, so deselect Windows 11 Home.
Double check it's the ARM64 build, not AMD64. You can check in the banner at the top.
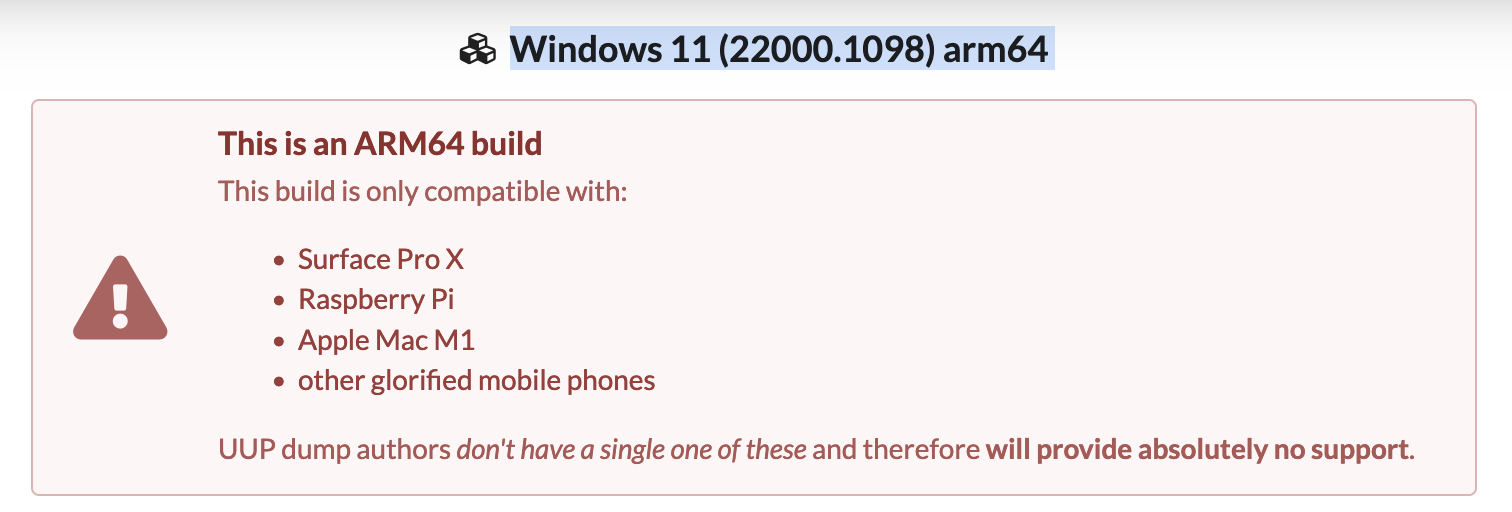
Click to download the creator script, and unzip it in your Downloads folder.
Open your terminal, cd to the file and run the creation script called uup_download_macos.sh
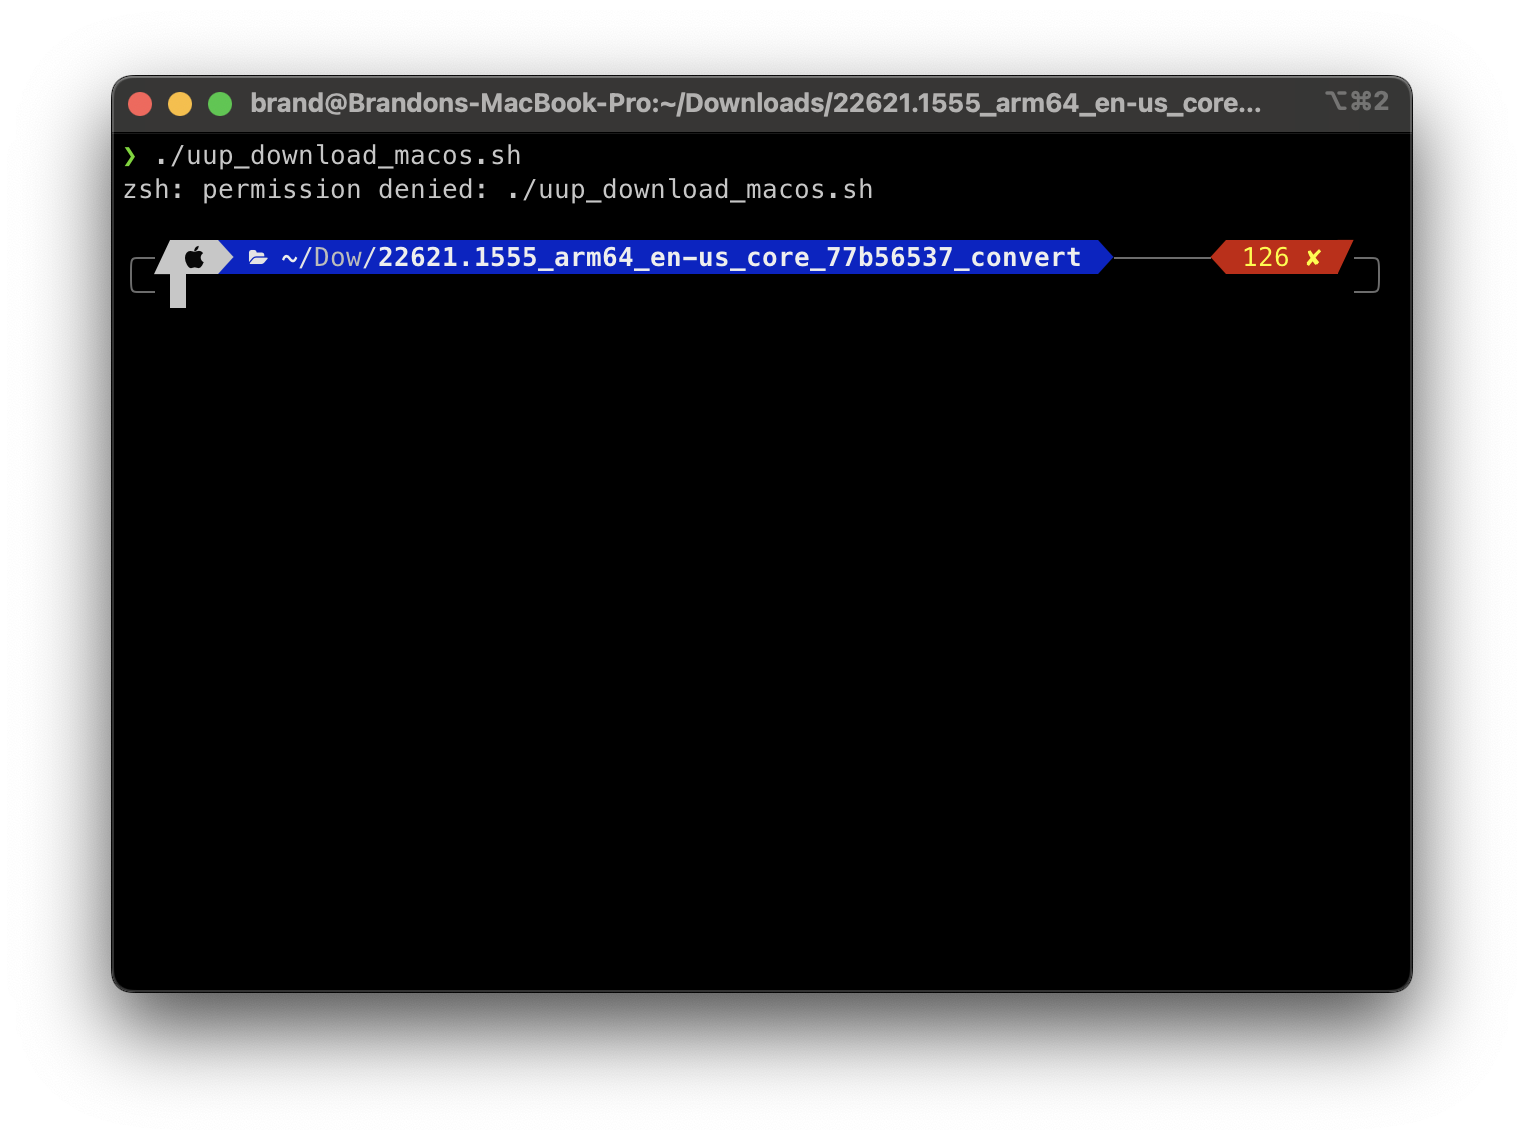
sigh. Take a deep breath, do the xattr quarantine dance, and run the script.
xattr -c ./*
chmod +x ./uup_download_macos.sh
./uup_download_macos.sh
Give it some time to do its magic and it should spit out a shiny new ARM64 Windows 11 install ISO into the same folder. Great!
2. Install Windows
Okay, next we create a new VM per the instructions on the UTM site.
Click the Plus, select Virtualize, and create a Windows VM.
Keeep Install Windows 10 or higher and Install drivers and SPICE tools selected.
Select the ISO image we just created as your Boot ISO image.
I gave it 3072MB ram, 2 CPU cores, 30GB HDD space.
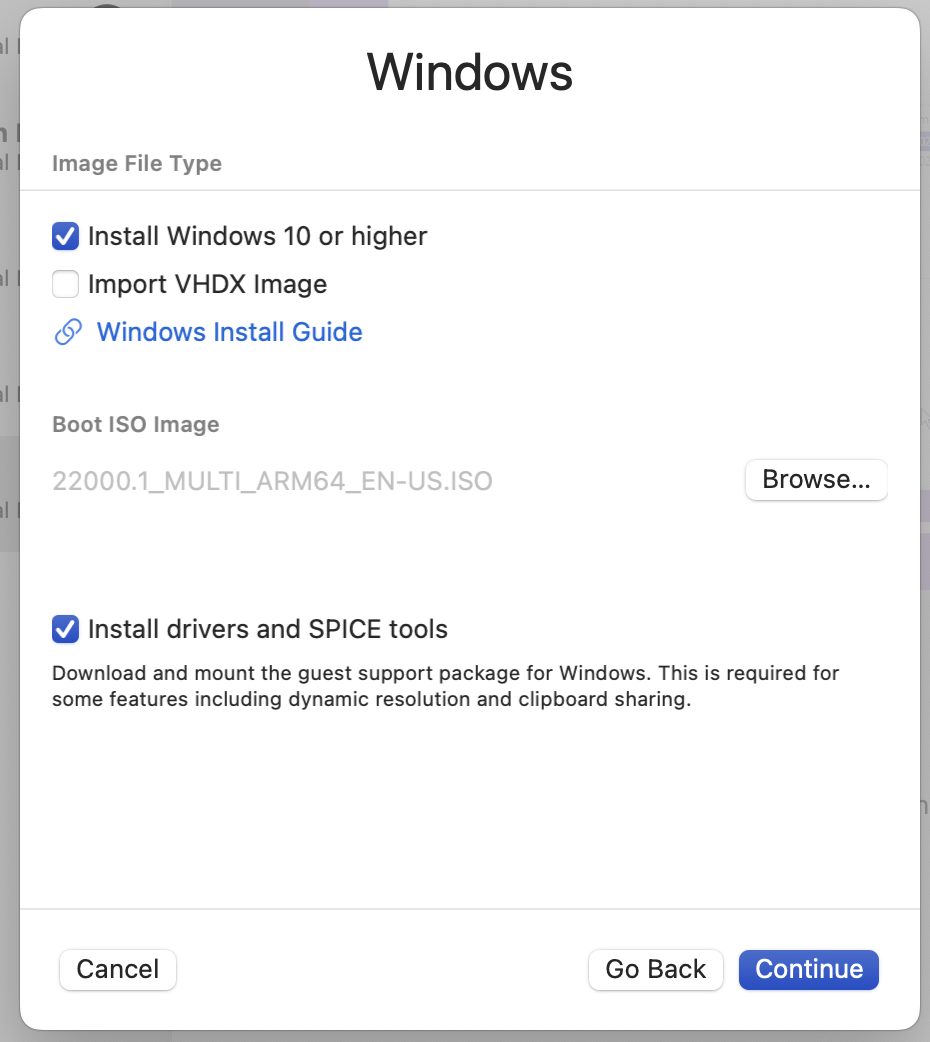
GO ahead and boot. Press a key to boot from CD/DVD.
Great! It looks like Windows!
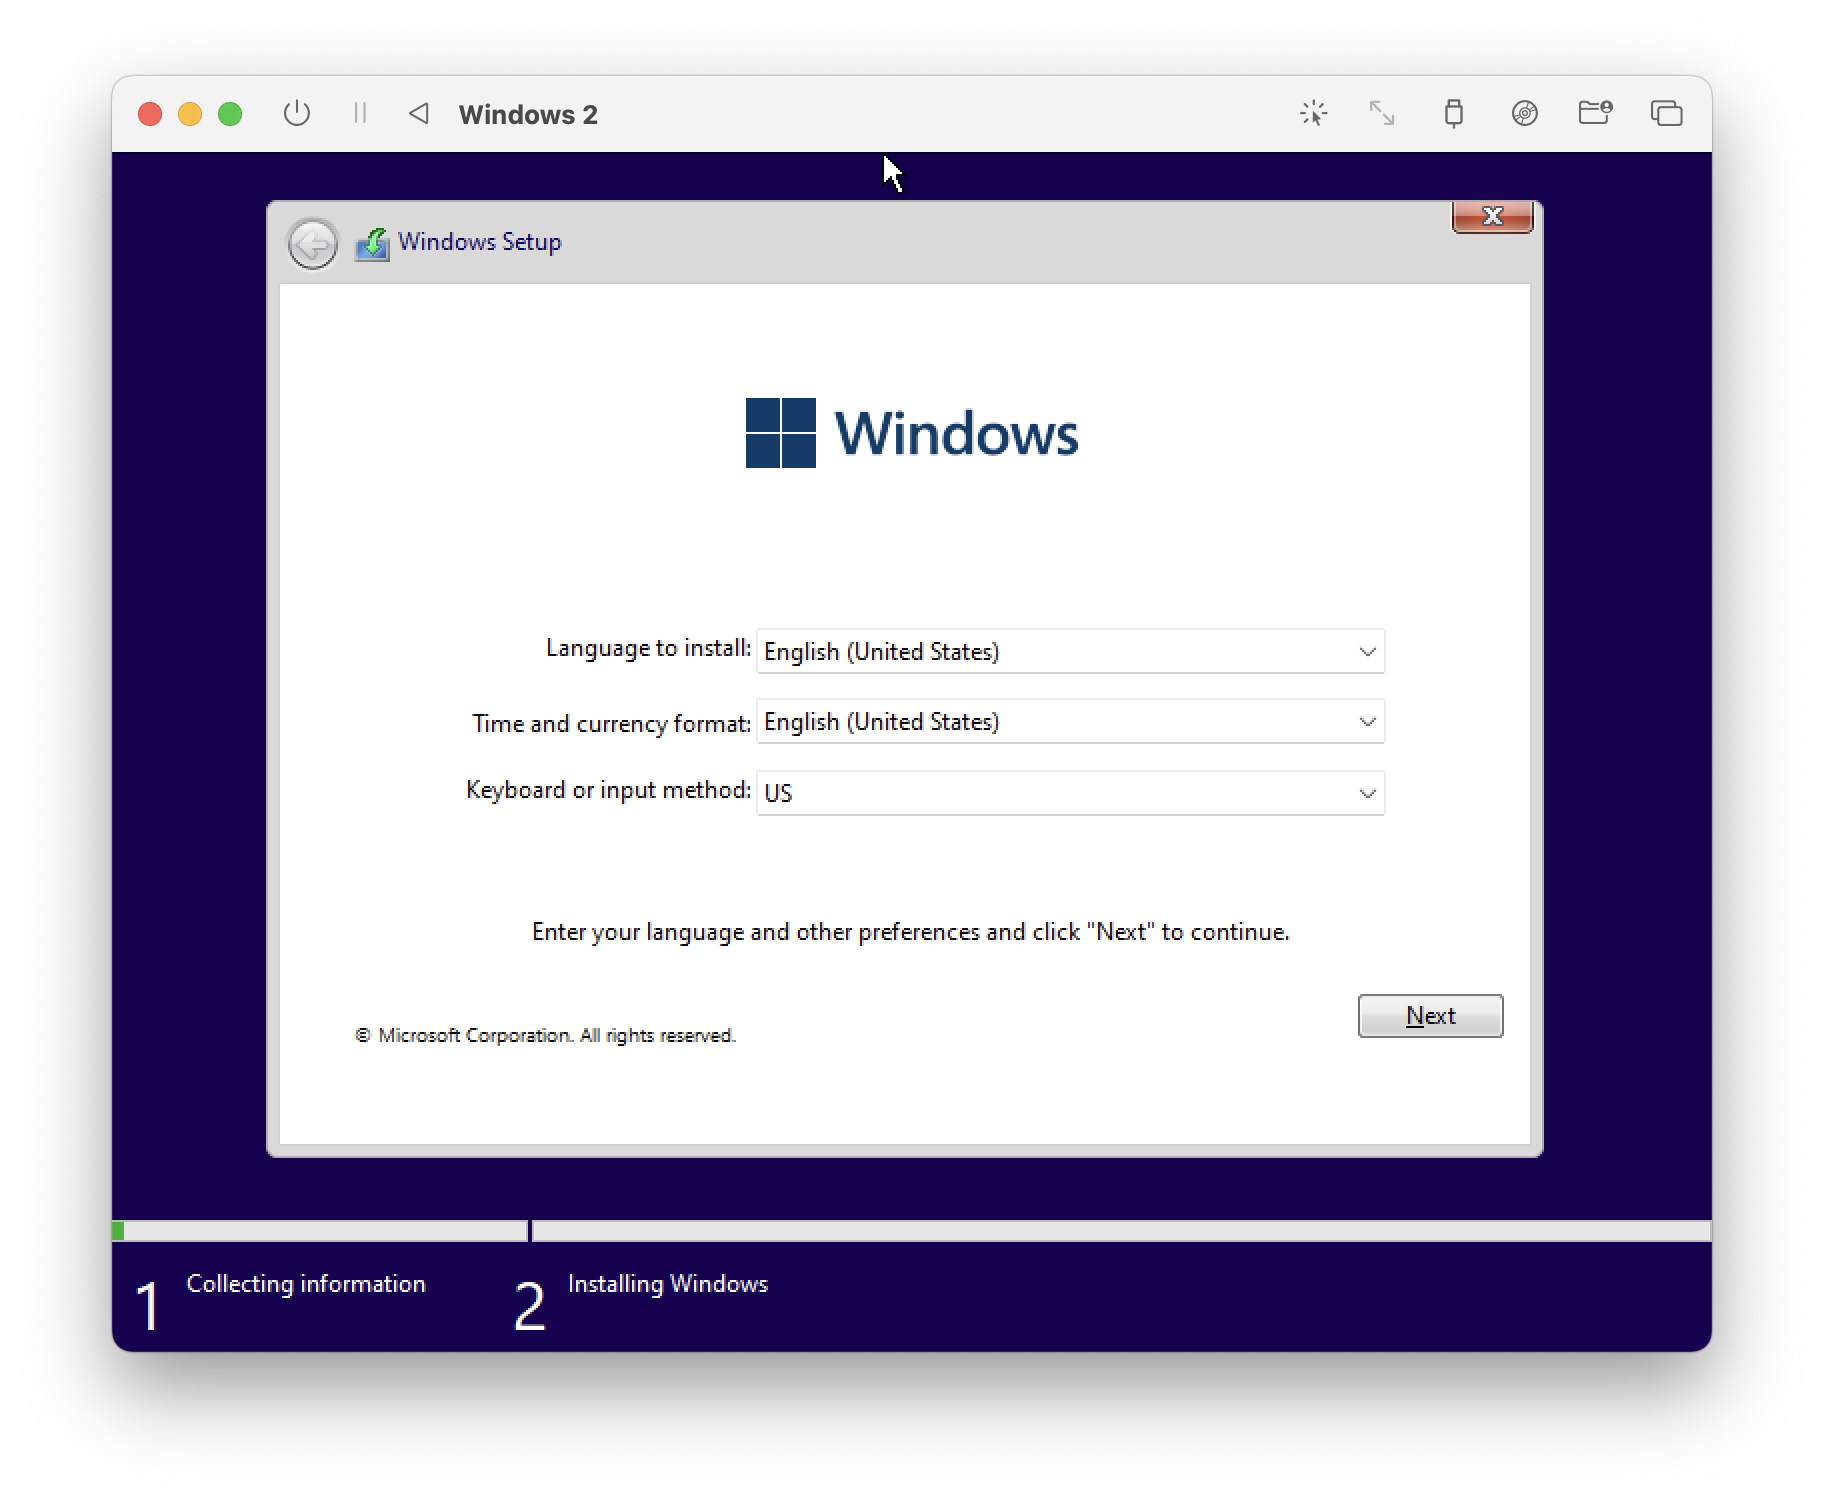
Go ahead and select no product key.
Choose Windows 11 Professional if you made a multi-version installer.
You might get this screen (I'm not sure what triggers it). If so, click Custom, and proceed.
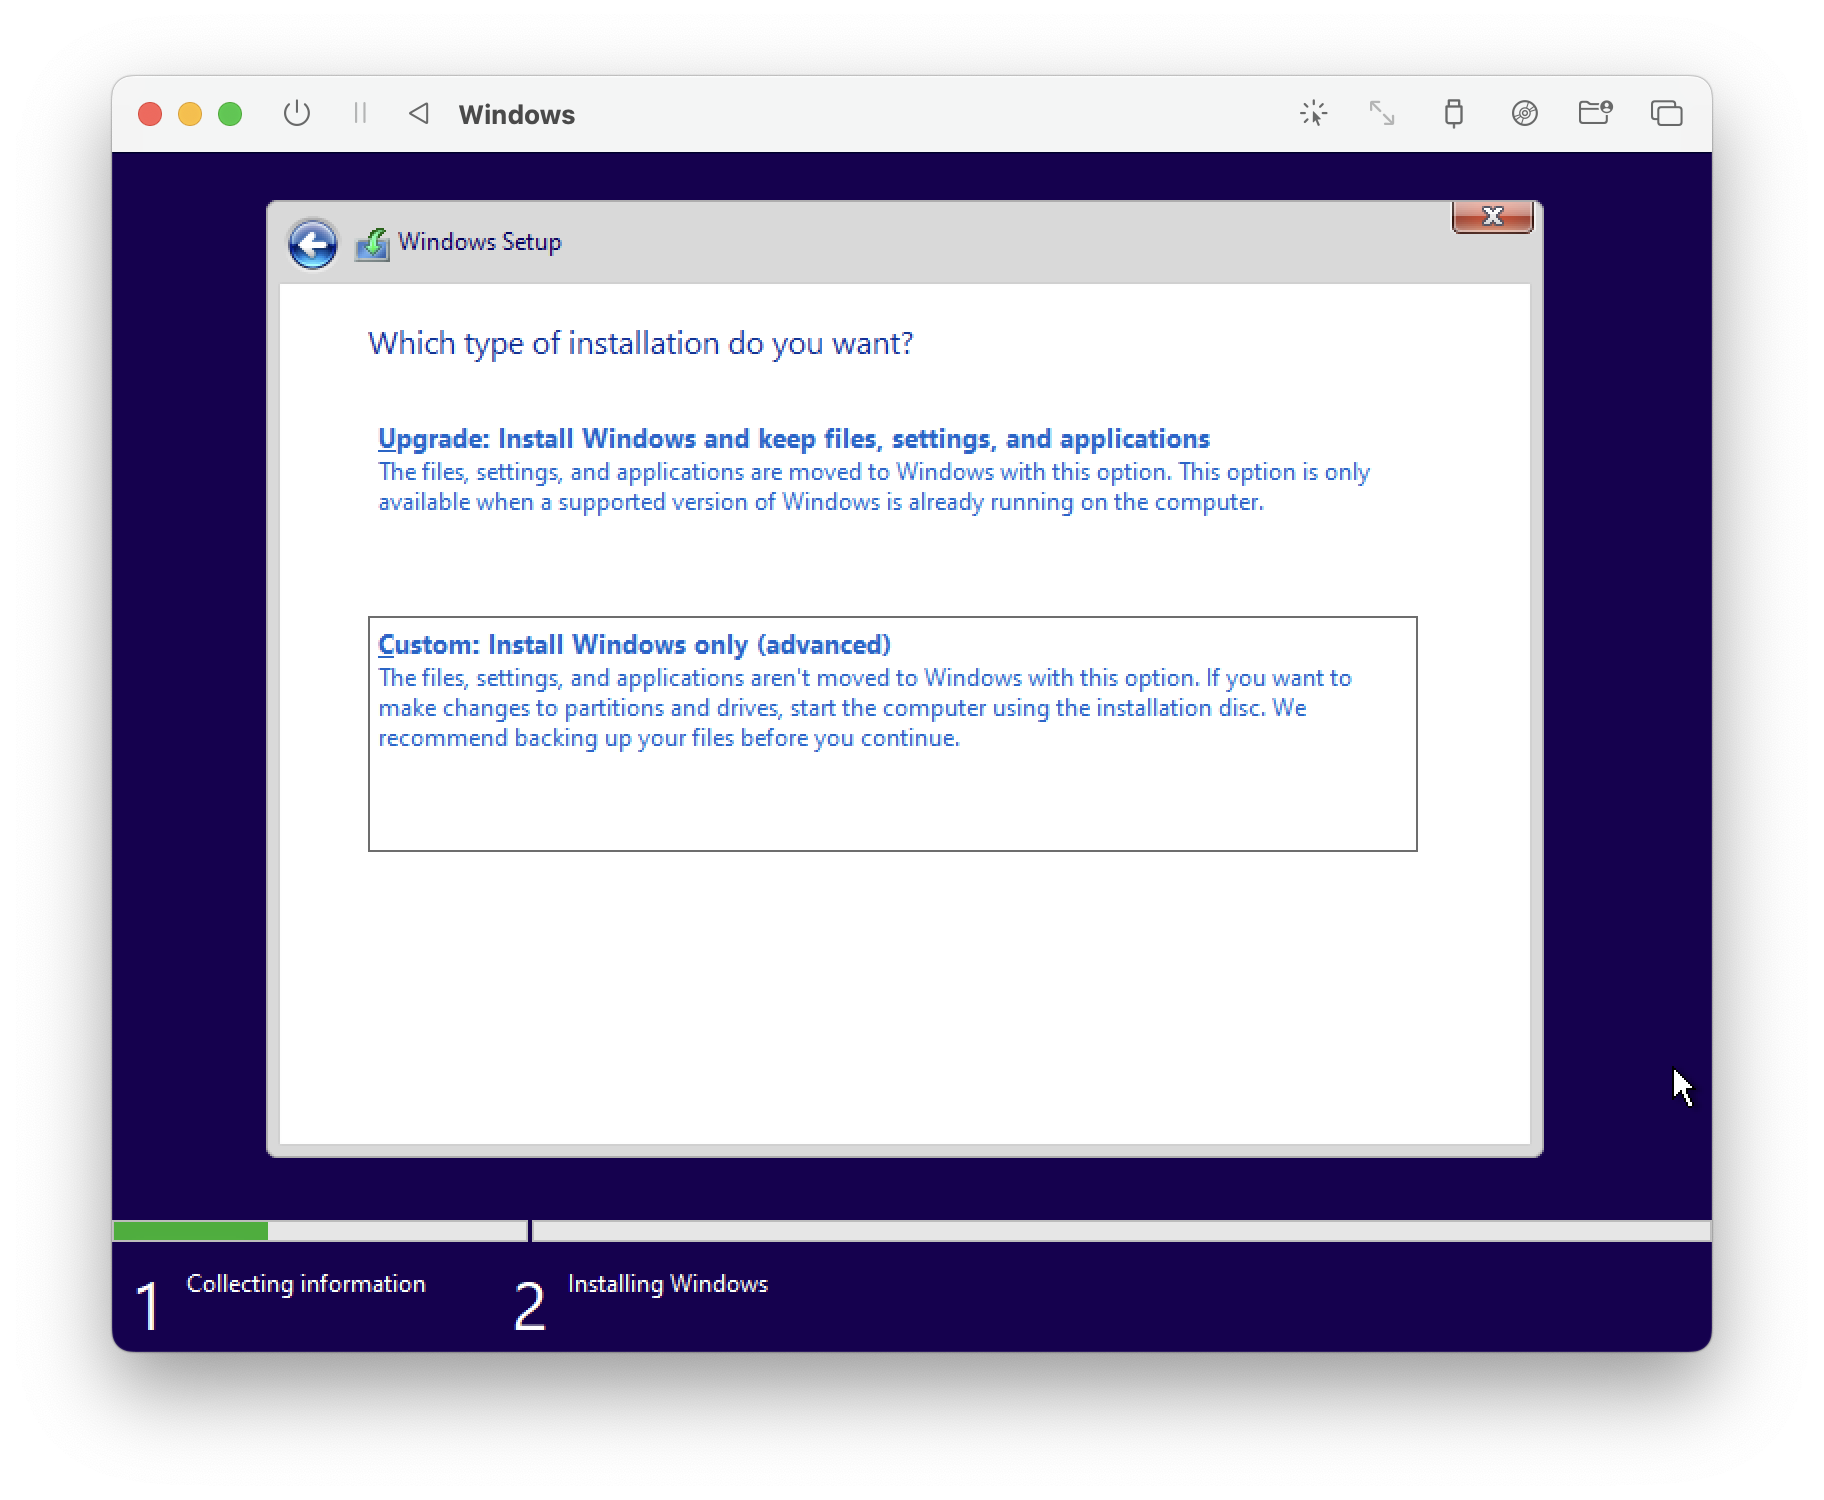
Accept the EULA.
Click "Drive 0 Unallocated space" (this is your virtual hard disk) and click "New", and then apply.
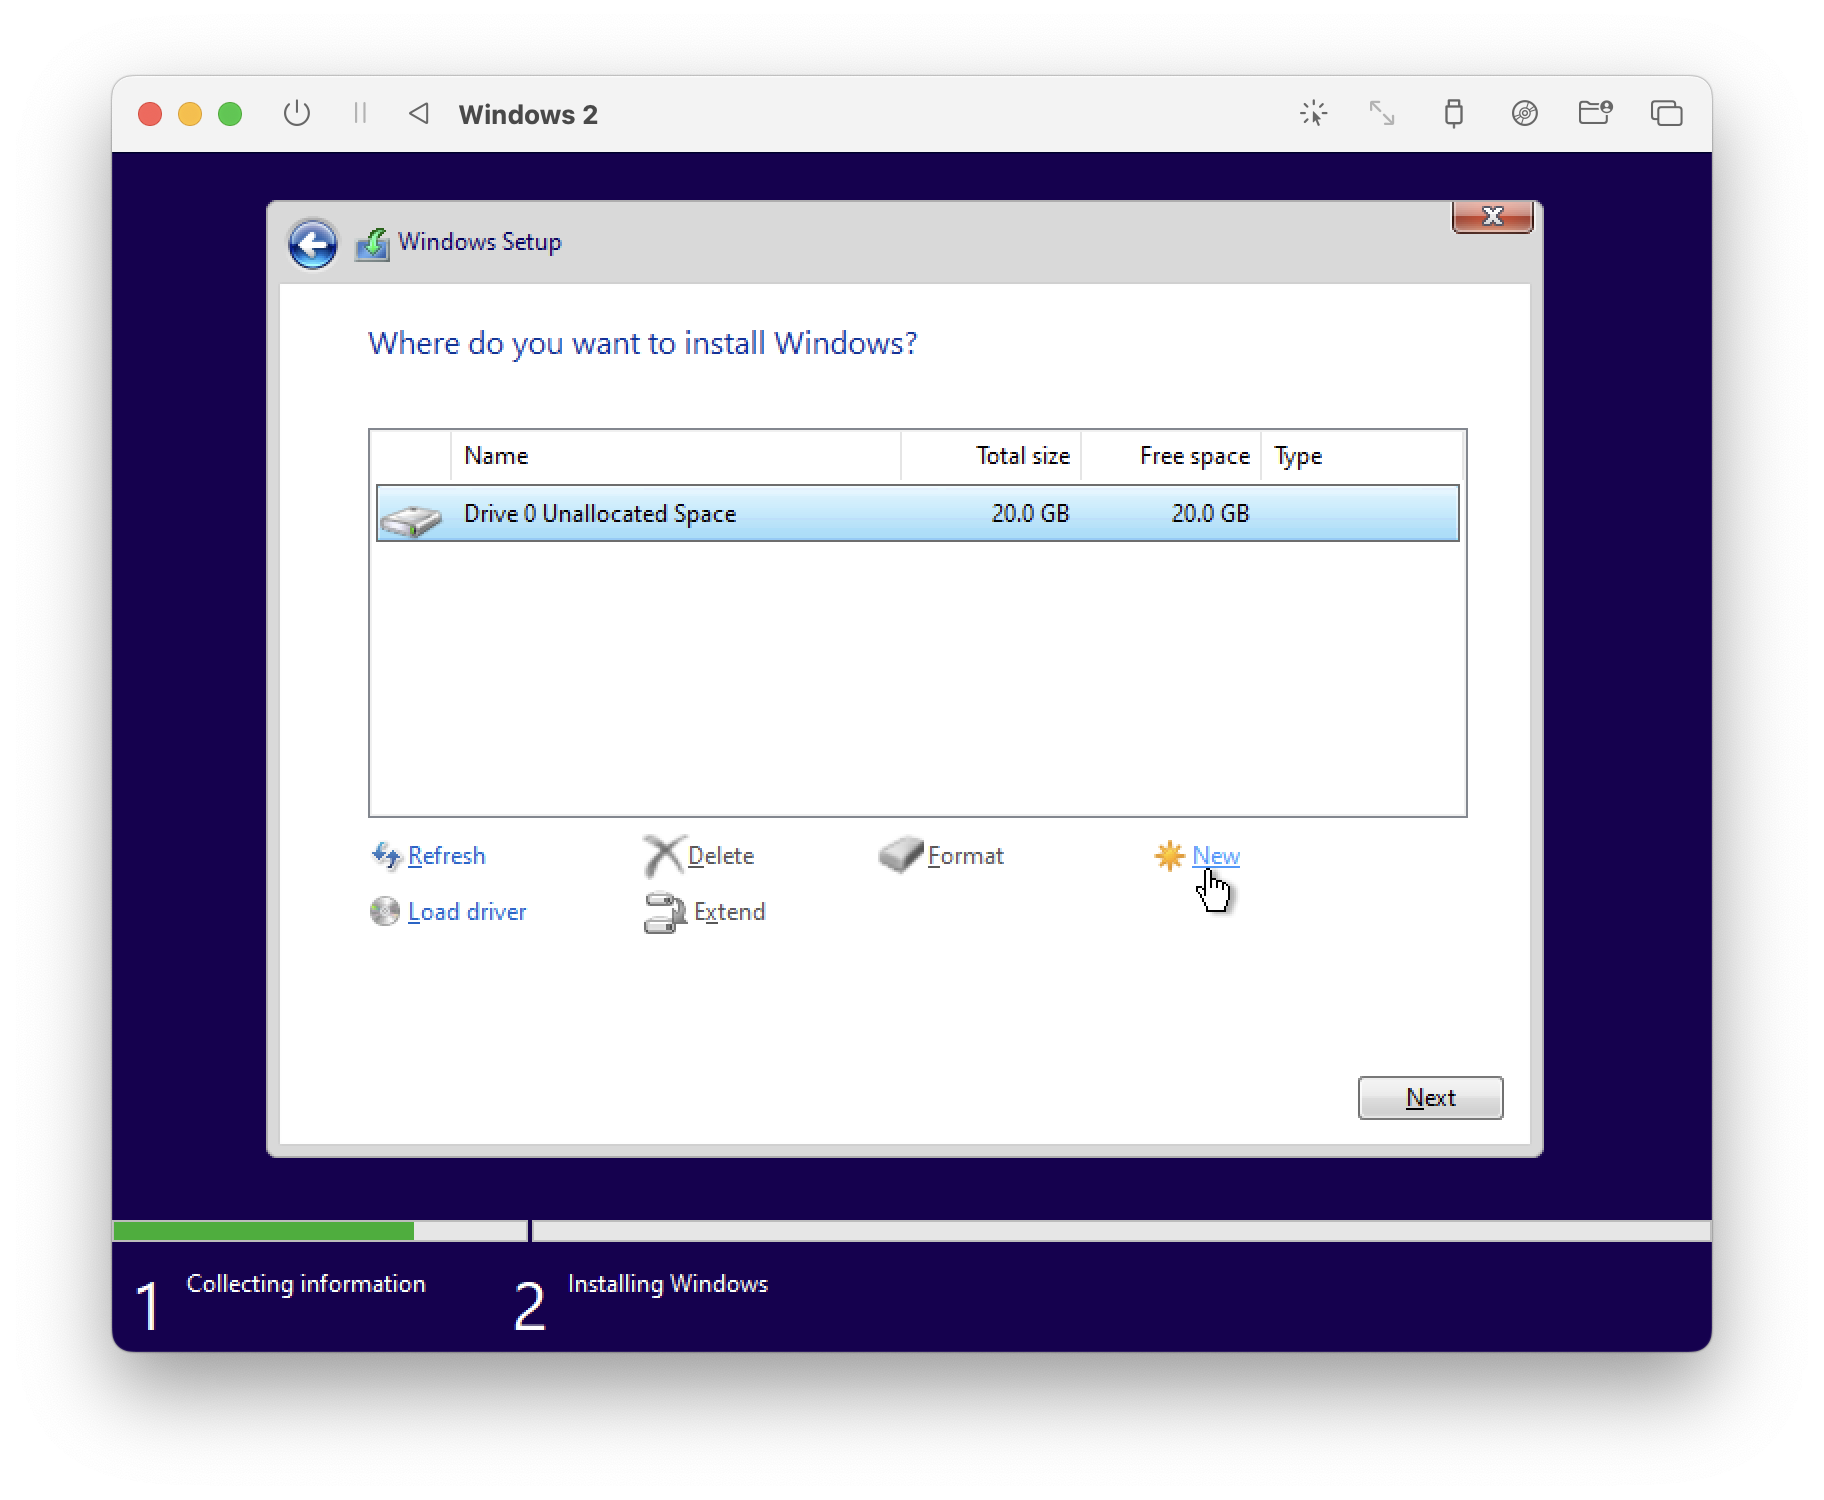
Then let the installer do its thing. It will reboot the VM and continue installing. This time, don't press anything when it says "press any key to boot from CD/DVD".
Then it will ask for your location, and continue installing.
Eventually you should be presented with the opportunity to create a user account.
Username: user
Password: password
Security questions: whatever you want.
Issues you may encounter:
Sign in with a Microsoft account
This iso should bypass the Window 11 requirement to sign in to a Microsoft account (Which you don't really want to do on your Malware Staging VM)
If you are somehow asked, you can follow instructions here:
https://www.tomshardware.com/how-to/install-windows-11-without-microsoft-account
They boil down to
1. Shift+ F10 for command prompt again.
2. Type OOBE\\BYPASSNRO. The VM reboots.
3. After reboot, press Shift + F10 again, and type ipconfig /release
4. You should be able to proceed with install.
"Your computer does not meet the requirements for Windows 11"
If you get this message, we can bypass this by editing the registry.
Anywhere in the installer, we can press Shift + F10 to open a command prompt.
here, type regedit and press enter. This should open the Registry Editor.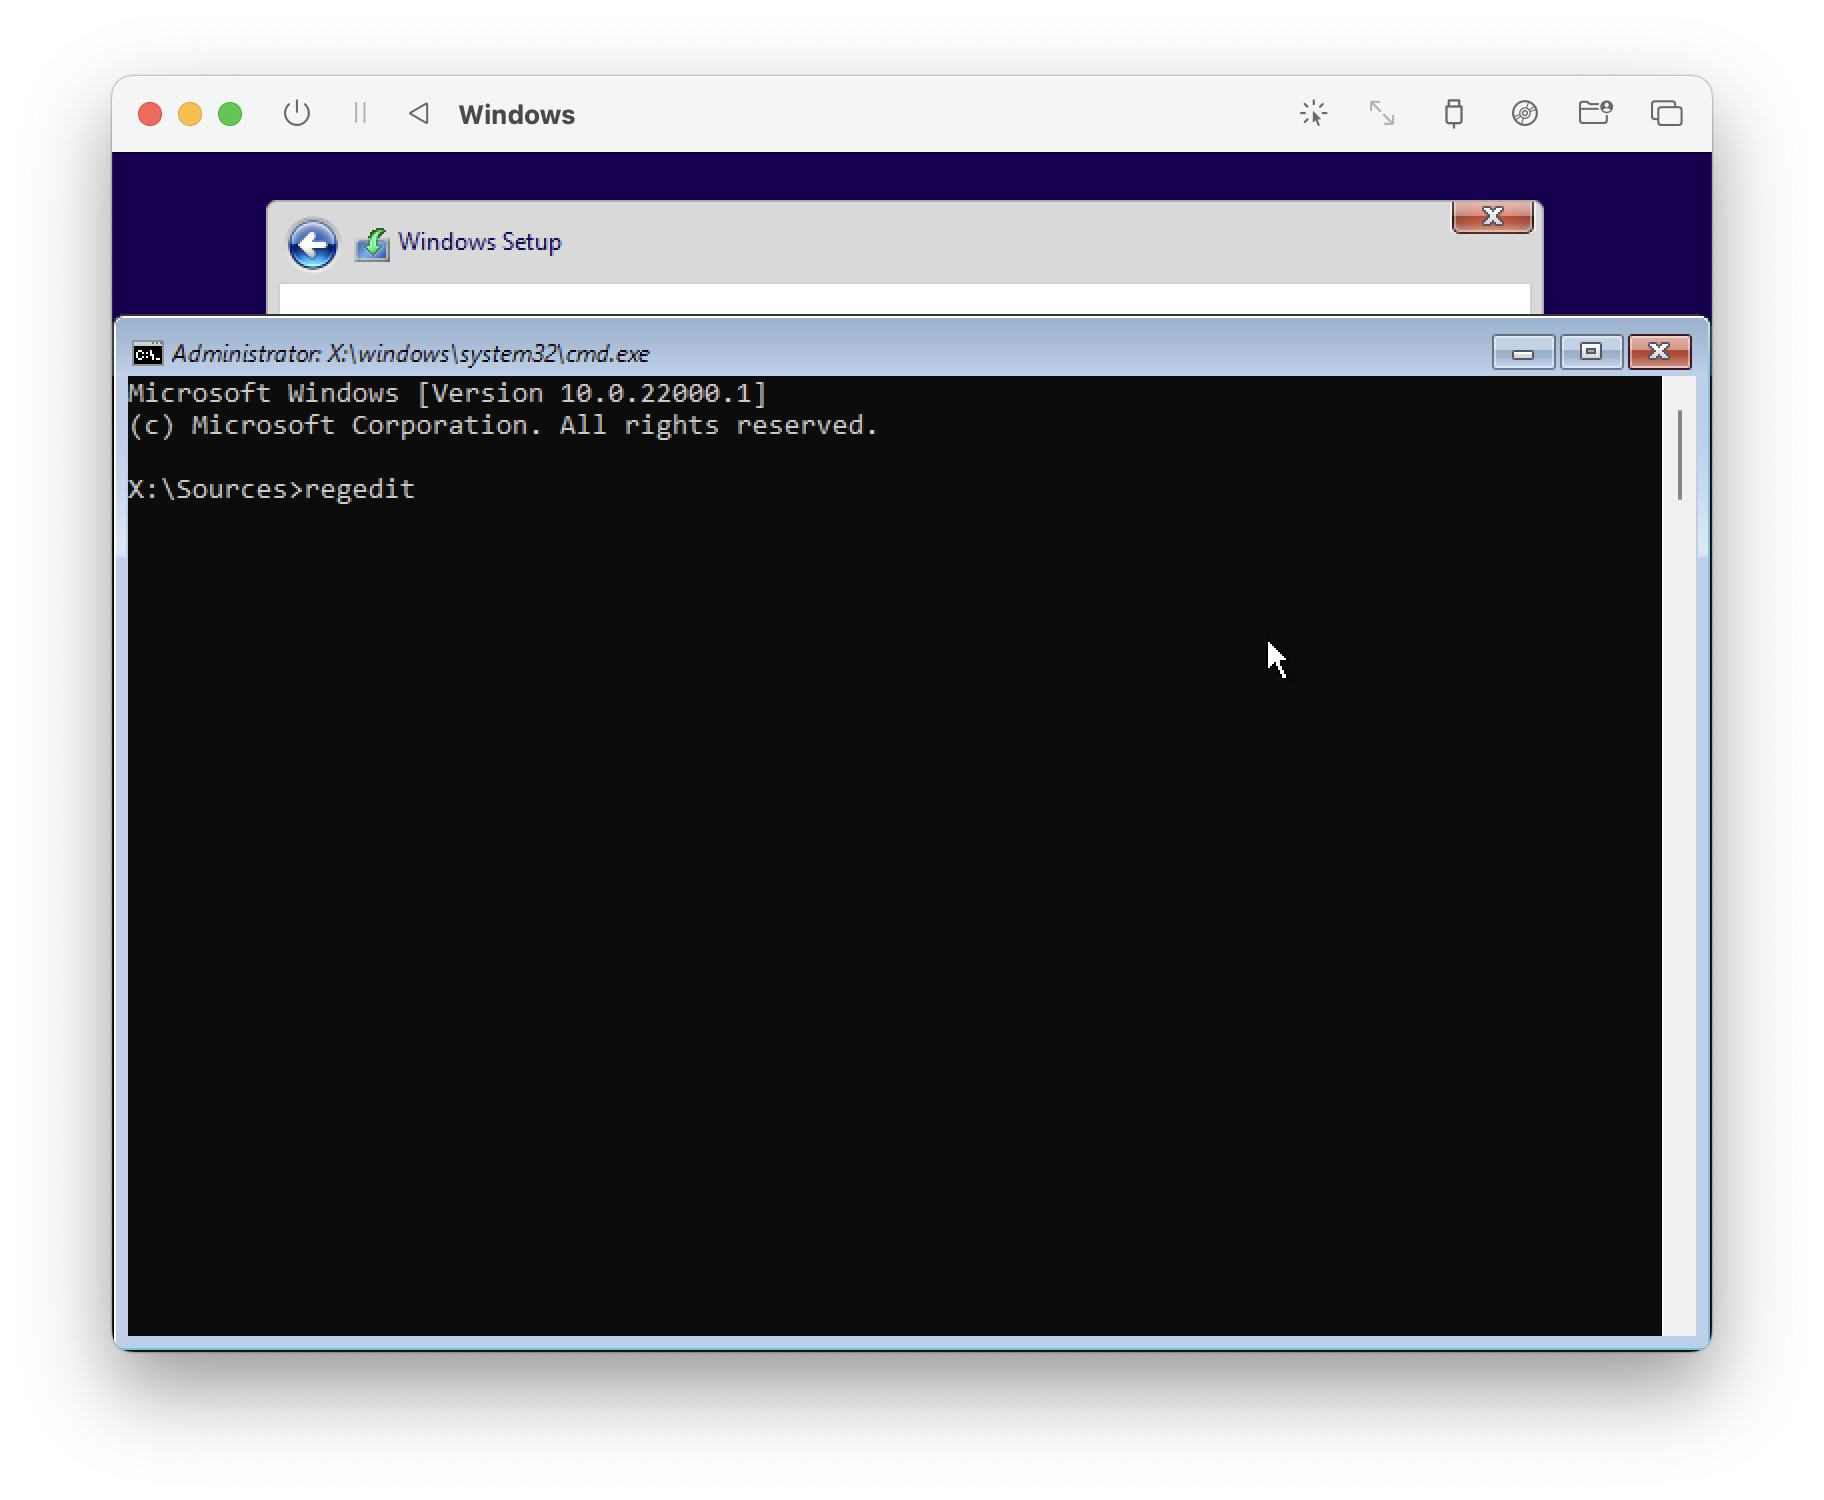
From here we will go to the following registry location and create some registry keys to bypass the minimum requirements.
Navigate to Computer\HKEY_LOCAL_MACHINE\SYSTEM\Setup\LabConfig
If the LabConfig folder isn't present under Setup, you need to create it. Right click on the Setup folder and select new Key. Name it LabConfig.
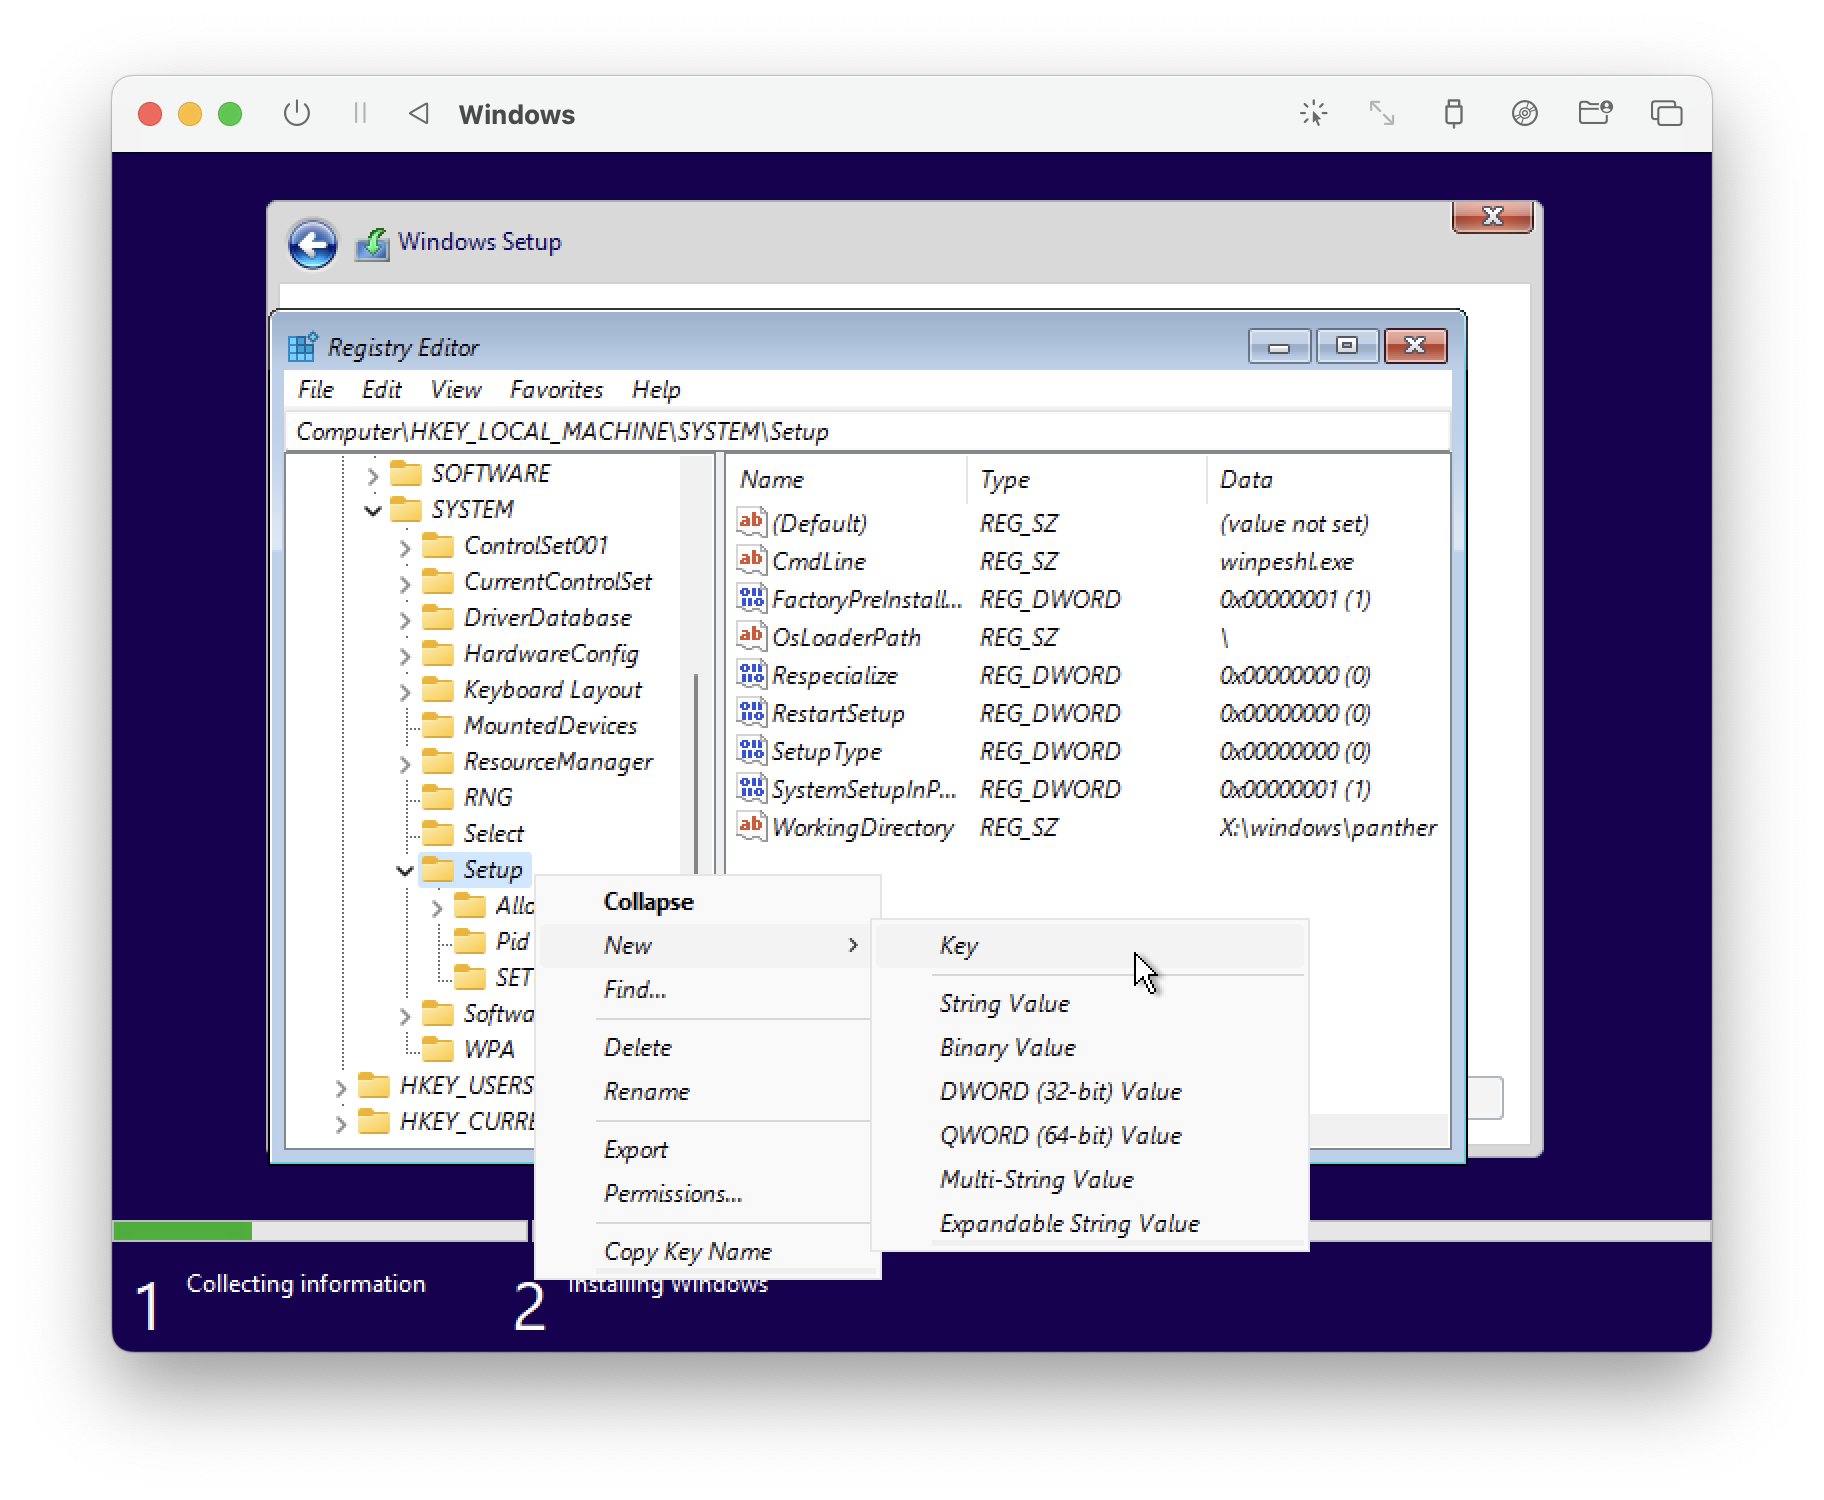
Now we create some new registry entries.
Select LabConfig on the left hand side.
Right click in the blank space on the right, select New DWORD (32-bit) Value.
Name the DWORD, then double click it to set the value.
Create the following Entries.
BypassRAMCheck = 1
BypassCPUCheck = 1
BypassTPMCheck = 1
It should look like this.
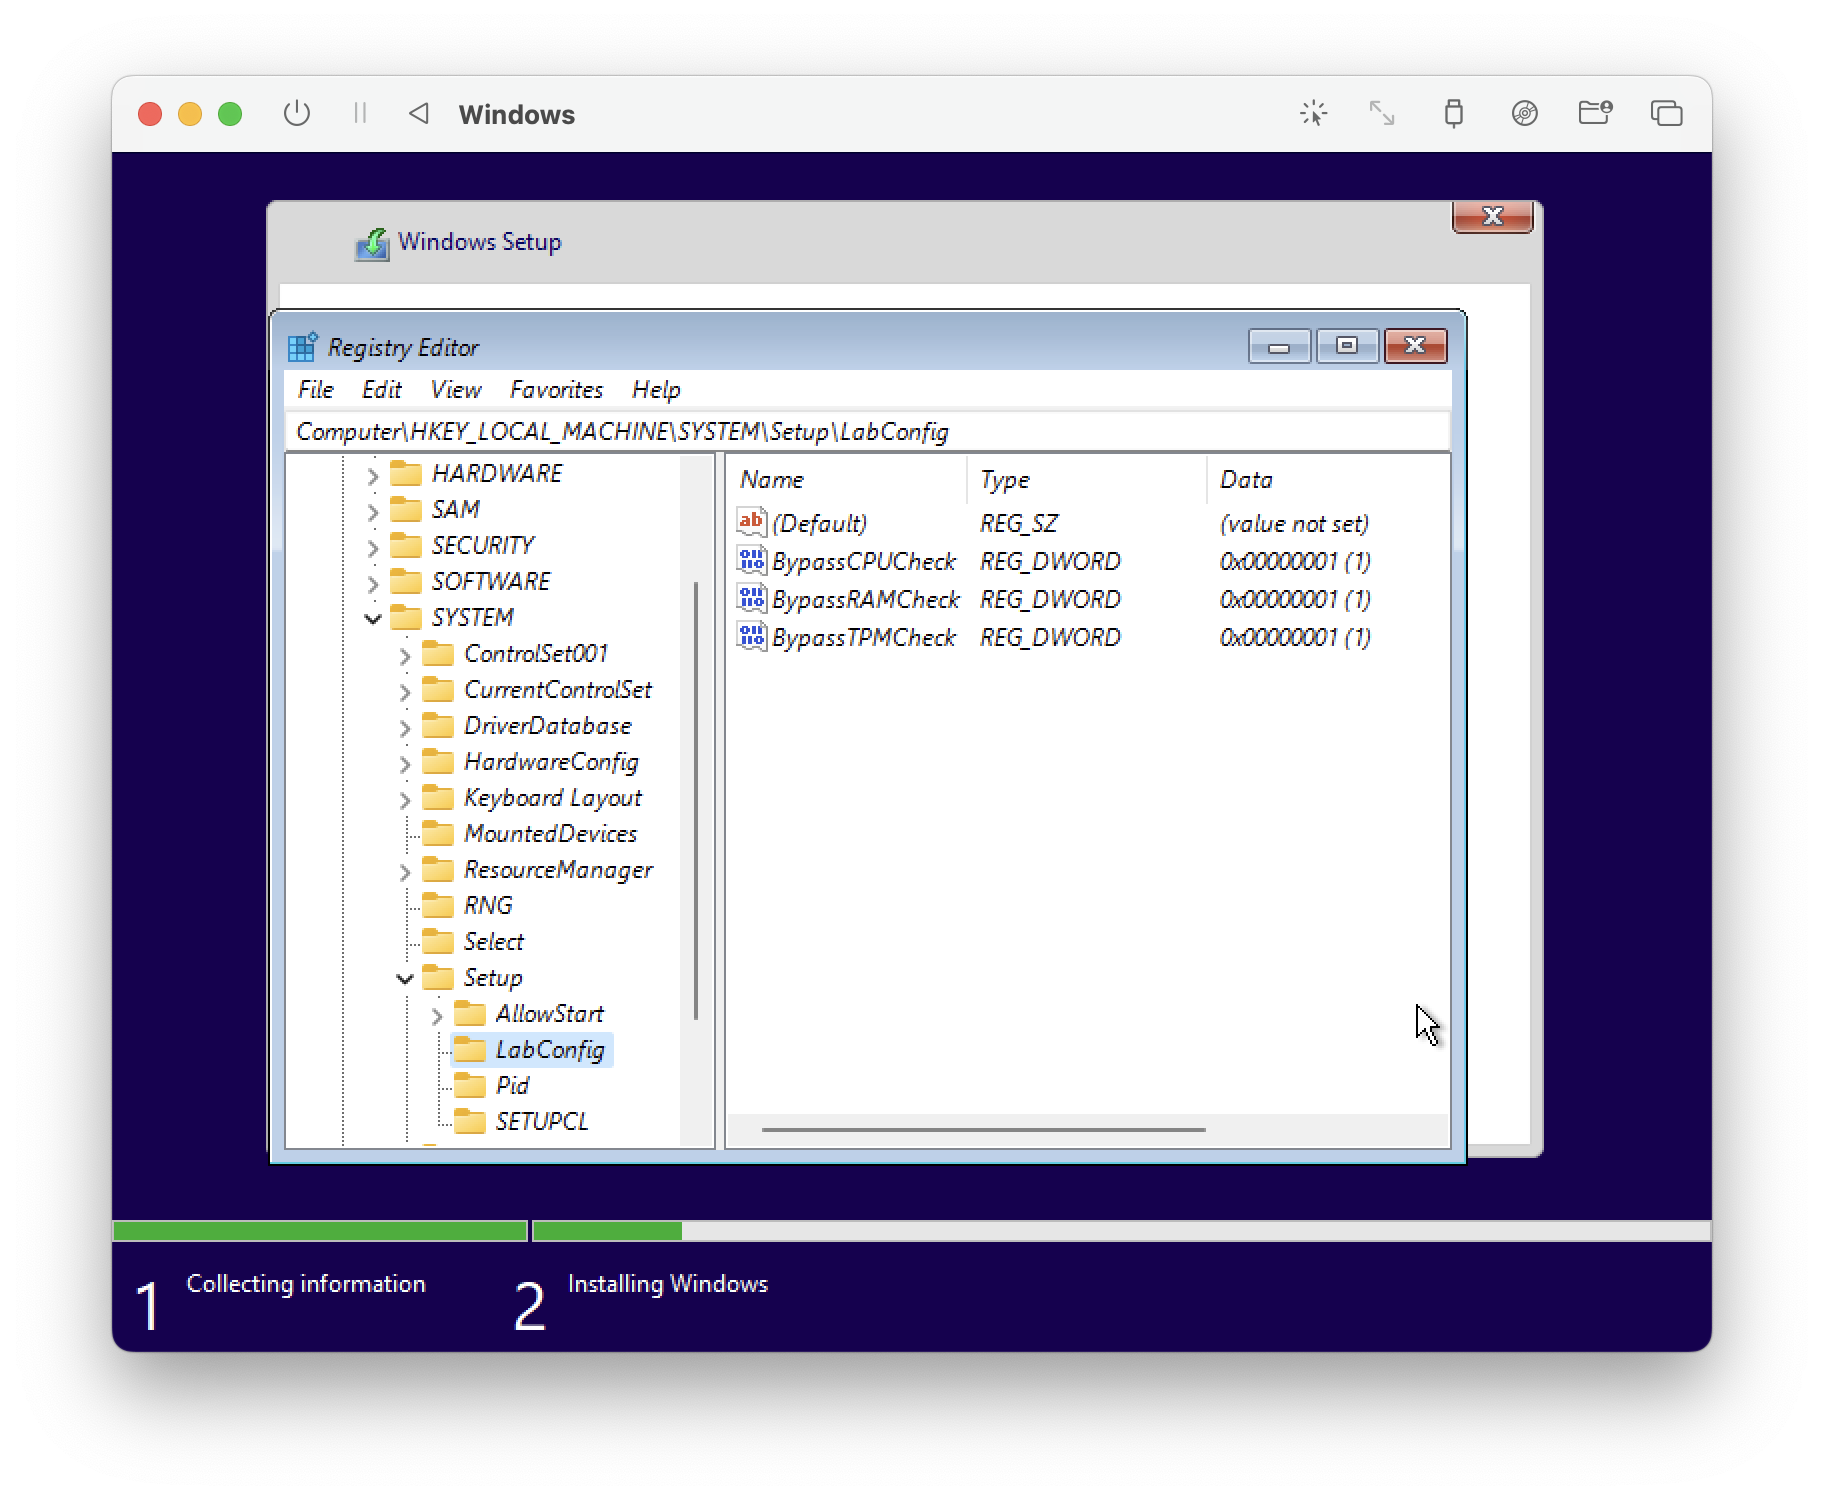
Great. We're ready to install.
Close the Registry Editor and the Command Prompt, and try to install again. If you still get an issue, press back on the installer until you get to the beginning and try again.
3. Updates and Configuration
Great. It boots to a desktop.
Next install SPICE Guest Tools from the virtual CD in Windows Explorer. The installer should pop up automatically. Install and reboot.
TIP: after it installed, i couldn't get the cursor to click the reboot button. press ctrl+option in this case to let the VM capture your cursor.
Finally we run Windows Update, to update this old version of Windows 11 to the most recent one.
From the start menu, open settings.
Click the Windows Update button at the top, and install any updates available.
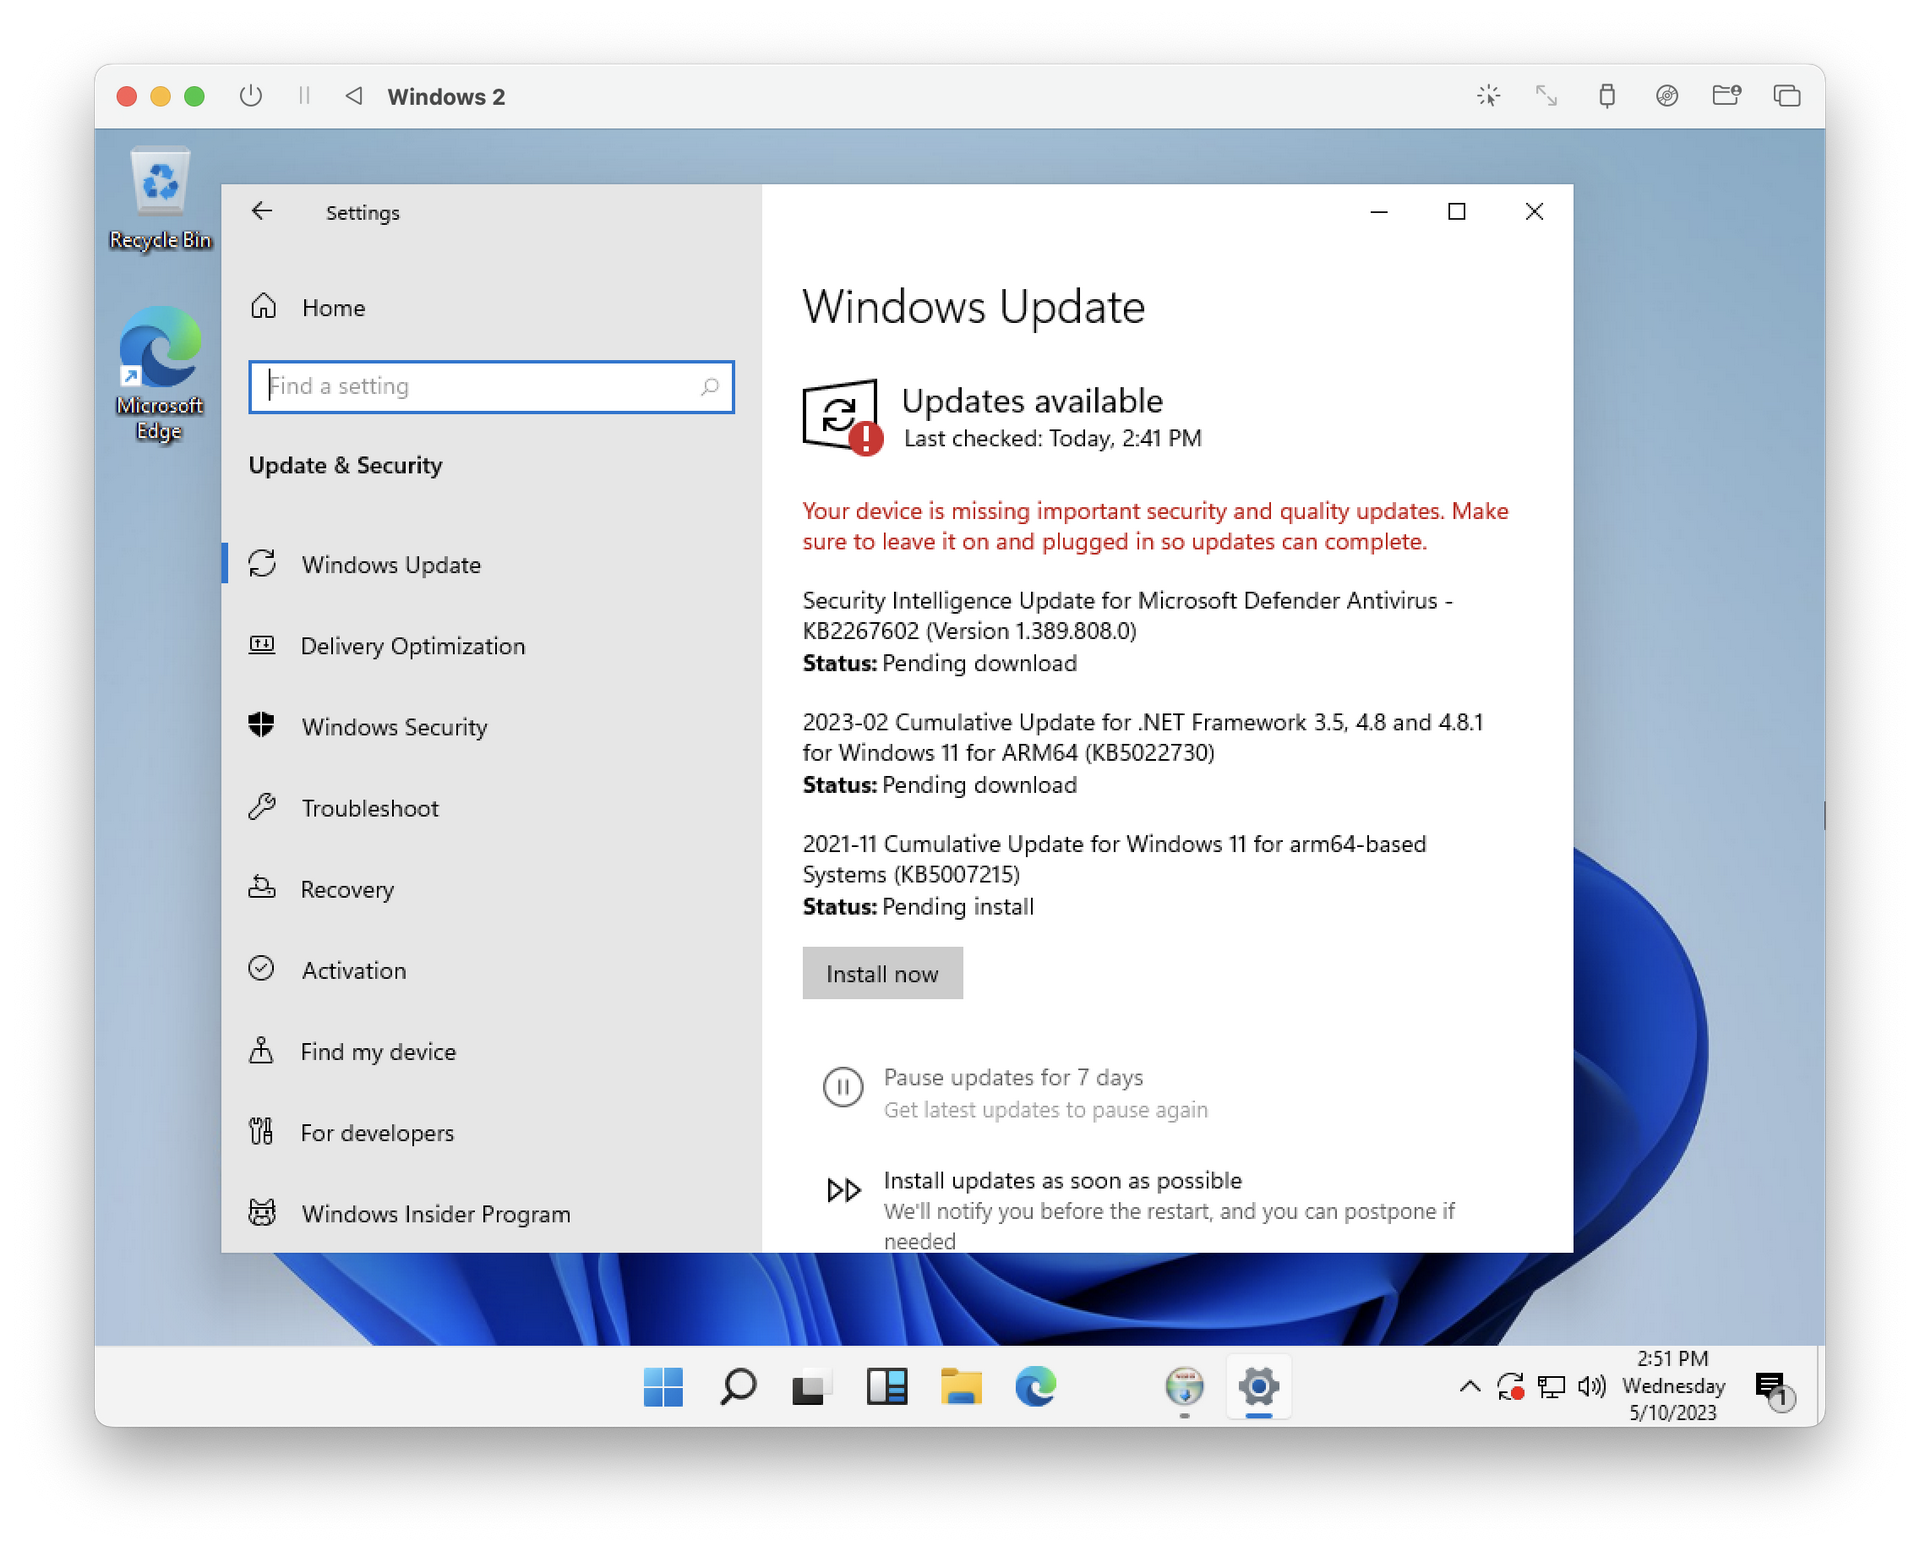
This takes a while. For me, it also got stuck, which I fixed by running the troubleshooter at Windows Settings -> Troubleshooting -> Other Troubleshooters -> Windows Update.
On each reboot, keep going back to Windows Update to see if any more updates are needed. It might take two or three cycles.
One this is done, there is one more registry edit we should do.
File Sharing Fix.
UTM's SPICE based file sharing between host and guest relies on WebDAV.
By default, in Windows the max file size for WebDAV transfers is set way too low.
Sharing anything over 50MB results in Error 0x800700DF.
We'll fix this with another registry edit. see here for info
Right click the windows button, click run on the menu there (or press Win + R).
type regedit and hit ok.
Just like before, find HKEY_LOCAL_MACHINE\SYSTEM\CurrentControlSet\Services\WebClient\Parameters
Double click FileSizeLimitInBytes and change it to ffffffff (in hex) or 4294967295 in decimal.
Your alternative to this is to just set up file sharing on the host mac in System Preferences, and connect to that directly from Windows.
Okay we have an up to date fresh Windows VM now! Awesome.
This is a good time to make a Clone of this VM in UTM to use as a template, if you can spare the disk space.
Great! We can finally start disabling security in line with Eric Capurro's SOC Analyst tutorial.
How to be a SOC analyst
Okay, Go to Eric's Part 1 post and follow the instructions to disable all the windows security features in setting. BUT DO NOT REBOOT INTO SAFE MODE. Come back here at that step.
The security related registry entries he wants us to make can't be made from a booted system. But if we try to reboot this VM into safe mode, it will just hang on boot and be difficult to boot normally again off. So how do we make the registry edits he tells us to?
We can instead boot the install ISO again, and make changes to the installed system from there.
Click the CD icon on the top right and check your virtual CD drives.
The first drive should still have the windows install iso. If it doesnt, find your iso file and reinsert it.
The second should have the spice-guest-tools iso. (if it doesnt, clicking "Install Windows Guest Tools…" will just put it back in for you.)
Then reboot and when it says "Press any key to boot from CD or DVD", go ahead and do that.
We need to do two things here.
1. Mount the virtual hard drive (assign a drive letter, in Windows parlance)
2. Edit the registry.
At the initial screen ("Install now"), press Shift+F10 to get a command prompt.
Type in C: into the prompt to switch to the VM's 'hard drive'.
If you get a message "The system cannot find the file specified, you will need to mount your drive manually."
Otherwise, you can skip this step.
Mounting the Drive:
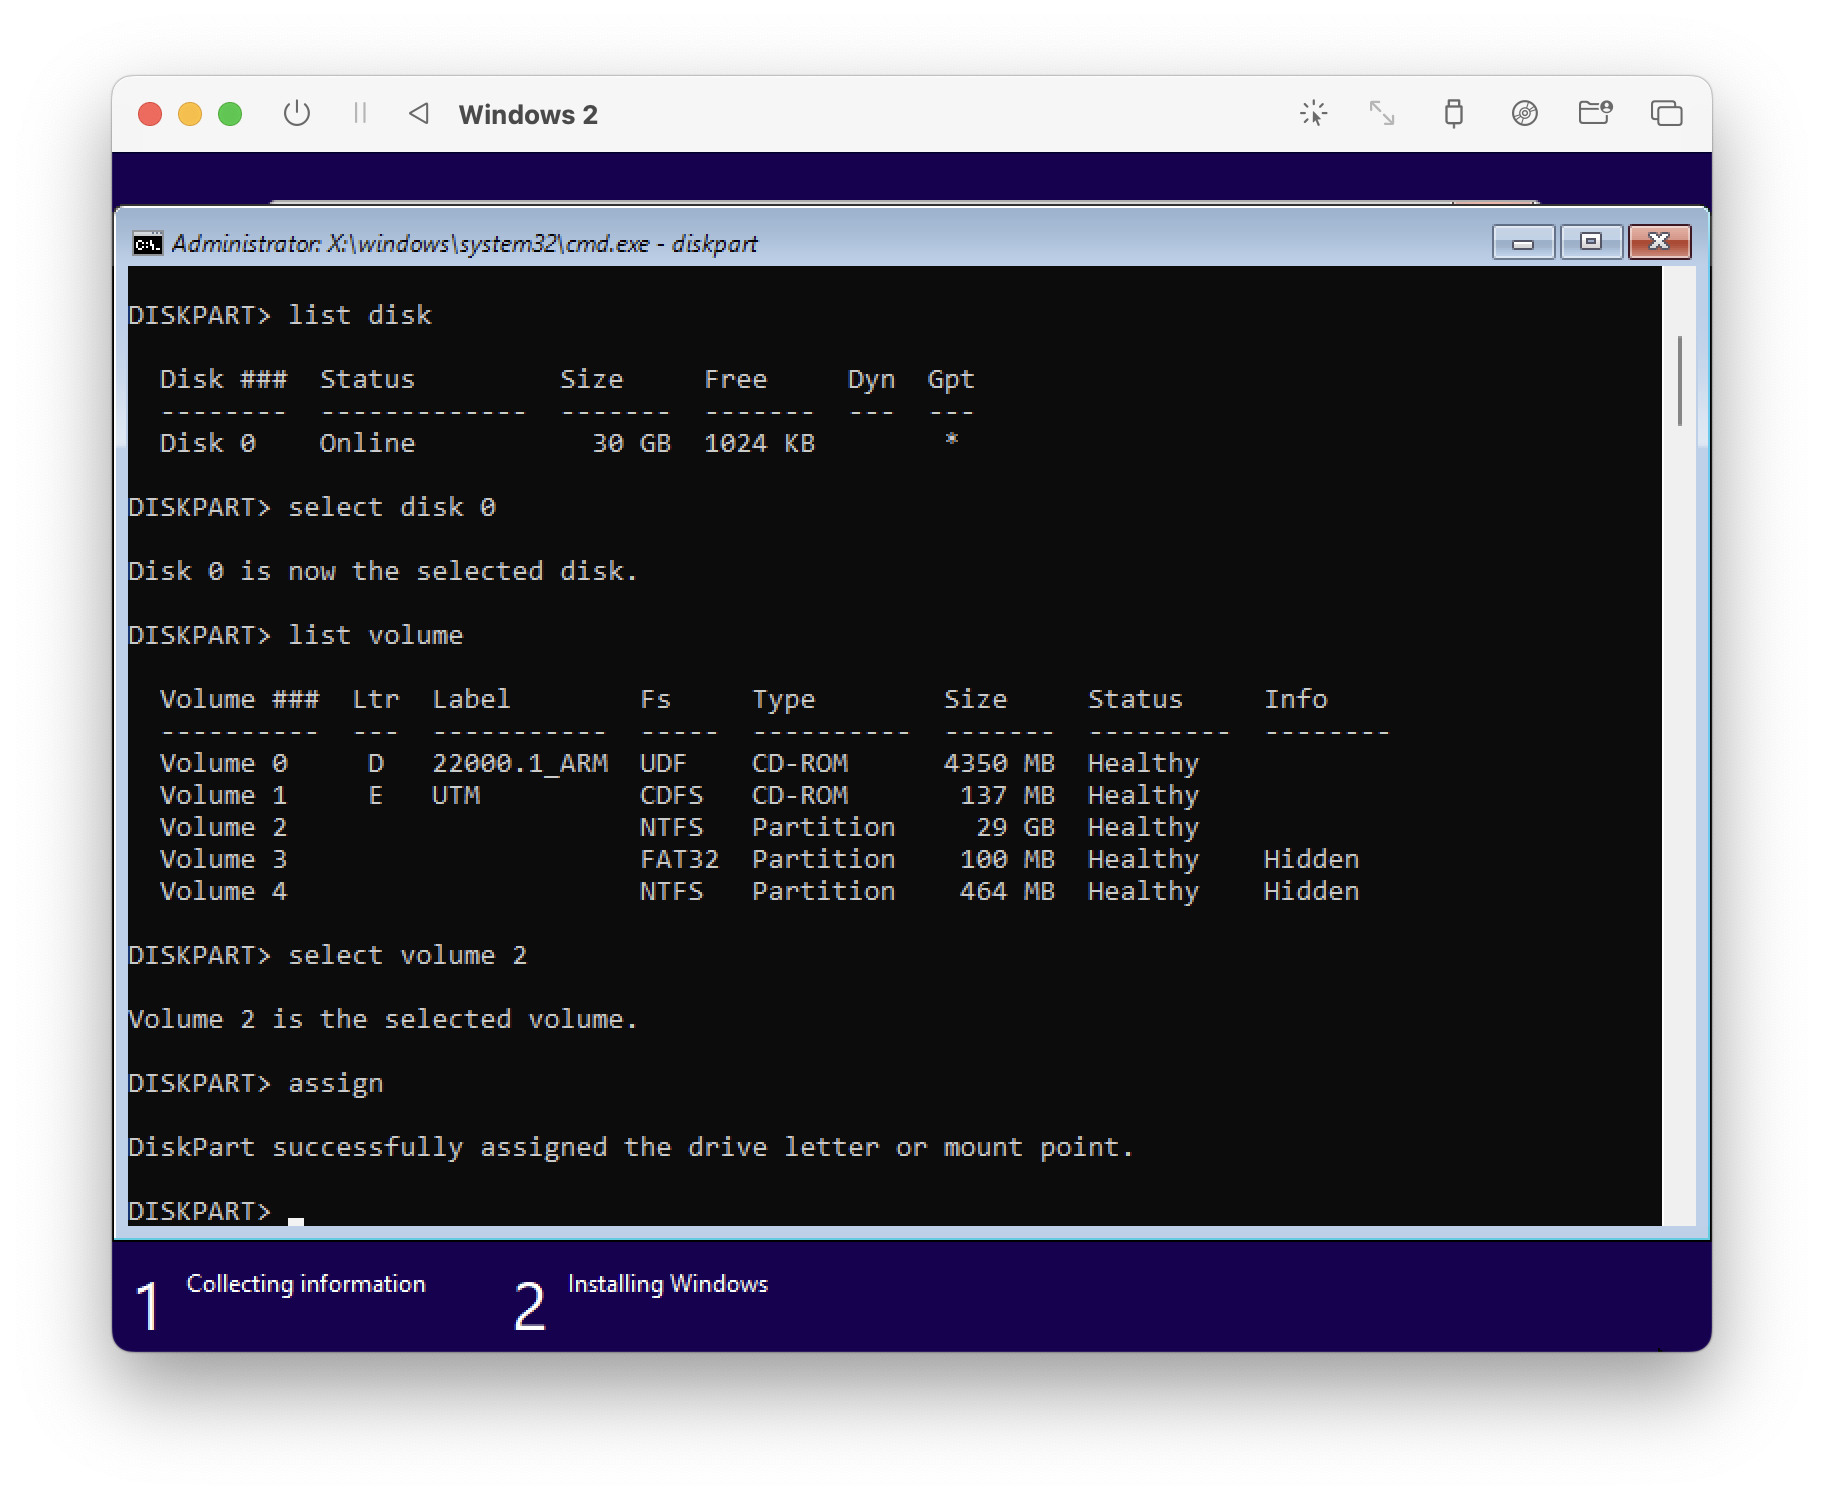
1. Type diskpart
2. list disk
You should see only one disk. In my case it's disk 0.
3. select Disk 0
4. list volume
You should see two CD-ROM volumes, and two or more "Partitions". You're looking for your install partition. Clues are it should have an FS of NTFS, and have the size that you set when creating the VM. It should not be Hidden. In my example, it's Volume 2.
When you've identified your volume, type
5. select volume n, where n is the volume number.
6. assign
And it should be mounted. type list volume again to check.
then type exit to leave DISKPART.
Editing Registry Files:
We can follow these instructions to make the registry changes.
1. type regedit and press enter to open Registry Editor
IMPORTANT. The entries you see straight away are actually the registry files for the Windows PE installer live environment. We need to load the registry from disk for our Win11 installation.
Per Eric's guide, all the entries we want to change are in the HKEY\_LOCAL\_MACHINE\\SYSTEM hive, which is located in the file C:\\Windows\system32\config\system
We load this from our installed system by:
2. Click HKEY\_LOCAL\_MACHINE in the tree view on the left side to select it
3.\ Click File -> Load Hive
4.\ In the resulting file dialog, select Local Disk C: and navigate to C:\Windows\system32\config, and select system
5.\ When asked for a Key Name, type offline.
And now in the offline folder on the left, you have the installed HKEY_LOCAL_MACHINE\SYSTEM hive. Notably there will be no CurrentControlSet key, but there is a ControlSet001.
Are there more than one ControlSet00x entries?
CurrentControlSet will be generated on boot. If there is more than one ControlSet key, you can click the Select Key and check the value of Current to see which ControlSet is active. So if it says 1, make changes to ControlSet001, if it says 2, ControlSet002 and so on.
In this image you can see the 'offline' registry key we created, which contains the loaded hive from C:\\Windows\\system32\\config
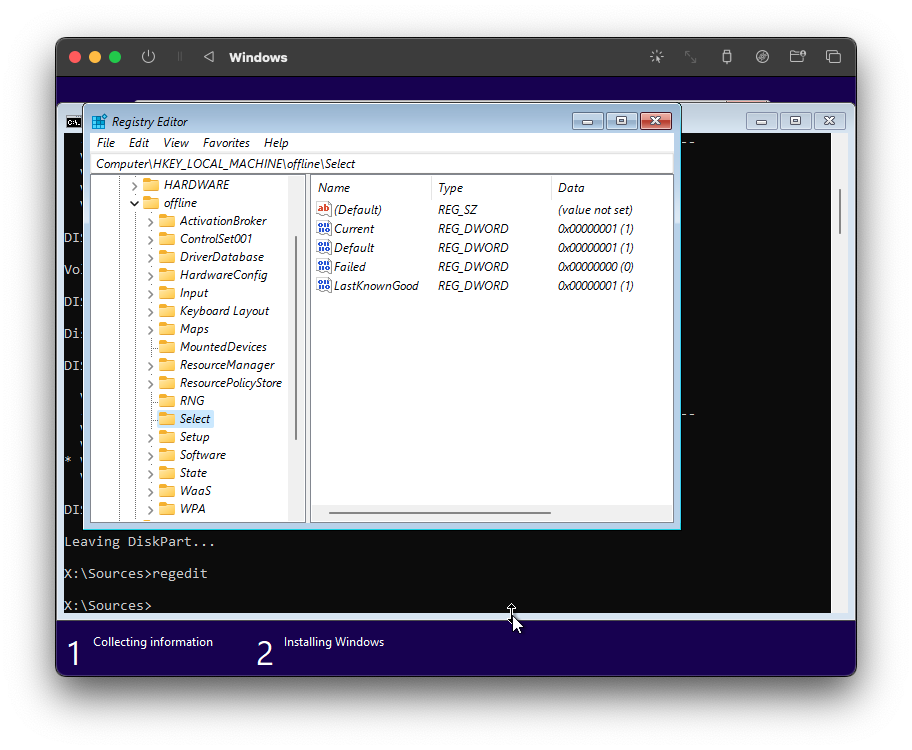
So from here, make the registry changes Eric asks you to. (Note, 'sense' wasnt present on my system).
The Start value of these keys should be set to 4
Computer\HKEY_LOCAL_MACHINE\SYSTEM\ControlSet001\Services\Sense
Computer\HKEY_LOCAL_MACHINE\SYSTEM\ControlSet001\Services\WdBoot
Computer\HKEY_LOCAL_MACHINE\SYSTEM\ControlSet001\Services\WinDefend
Computer\HKEY_LOCAL_MACHINE\SYSTEM\ControlSet001\Services\WdNisDrv
Computer\HKEY_LOCAL_MACHINE\SYSTEM\ControlSet001\Services\WdNisSvc
Computer\HKEY_LOCAL_MACHINE\SYSTEM\ControlSet001\Services\WdFilter

When you're done, scroll back up to the offline key we created, click it to highlight it, then click File -> Unload Hive. Click yes to the confirmation prompt.
Great. Now you can reboot. We've finally disabled Windows Defender.
We finally have a suitable VM for exploring cyber security.
Prevent the VM from going into standby
Just follow Eric's instructions for this part
Getting Sysmon
Unfortunately the x64 release of Sysmon won't run in our arm64 VM.
Instead we can source the arm64 port from Microsoft instead.
Thankfully we just swap that in and everything else stays the same, except that the service will instead be called sysmon64a.
These instructions are directly lifted from Eric Cappurro's guide, with minor changes.
Run the following commands in an Administrative Powershell instead:
-
Launch an Administrative PowerShell console
Click the “Start” menu icon
Type “powershell” into the search bar within the Start Menu
Right+Click “Windows PowerShell” and click “Run as administrator”
-
Run the following command which will download the entire Microsoft SysInternals Suite for ARM64 machines, extract the archive, download SwiftOnSecurity’s Sysmon config, and then Install Sysmon with Swift’s config, and check its installed.
The only difference relating to Sysmon here on is that we refer to the exe file Sysmon64a.exe rather than Sysmon64.exe.
Invoke-WebRequest -Uri https://download.sysinternals.com/files/SysinternalsSuite-ARM64.zip -OutFile C:\Windows\Temp\SysInternals.zip

Expand-Archive -LiteralPath C:\Windows\Temp\SysInternals.zip -DestinationPath C:\Windows\Temp\Sysmon

Invoke-WebRequest -Uri https://raw.githubusercontent.com/SwiftOnSecurity/sysmon-config/master/sysmonconfig-export.xml -OutFile C:\Windows\Temp\Sysmon\sysmonconfig.xml

C:\Windows\Temp\Sysmon\Sysmon64a.exe -accepteula -i C:\Windows\Temp\Sysmon\sysmonconfig.xml

Get-Service sysmon64a

If you see the service running you're good to go.
Check that sysmon is writing logs properly too.
Get-WinEvent -LogName "Microsoft-Windows-Sysmon/Operational" -MaxEvents 10
LimaCharlie EDR
Installing the x64 LimaCharlie EDR, everything seemed to work fine for me. No changes here. Just follow the instructions for this on Eric's post.
Okay, we're set up with our Windows VM!
Ubuntu Server:
Installation
This is more straightforward. You can refer to the UTM guide.
Click plus to create a new Linux VM, follow the instructions.
You can click the link to the UTM guide and follow that. The guide even links you to the Ubuntu server aarch64 iso image. Nice.
Do yourself a favour and select Enable hardware OpenGL acceleration to stop annoying screen tearing.
Make sure you're not too stingy on the disk space. I started to run out during the tutorial. 20GB should be enough. 1GB ram was also fine for me. Leave everything else.
Go ahead and boot the VM and follow the instructions. Do install OpenSSH but you don't need any extra packages.
Don't install ubuntu-desktop like the UTM guide says. We won't need it.
After this you can boot your shiny new VM.
Networking
Eric's guide suggests setting a static IP. However, I had issues when doing this while using UTM.
You can just forgo this step and bear in mind that if things arent working, it's possible the IP address got renewed. Just run ip a in the Linux VM to check. In practice, I didn't see this happen.
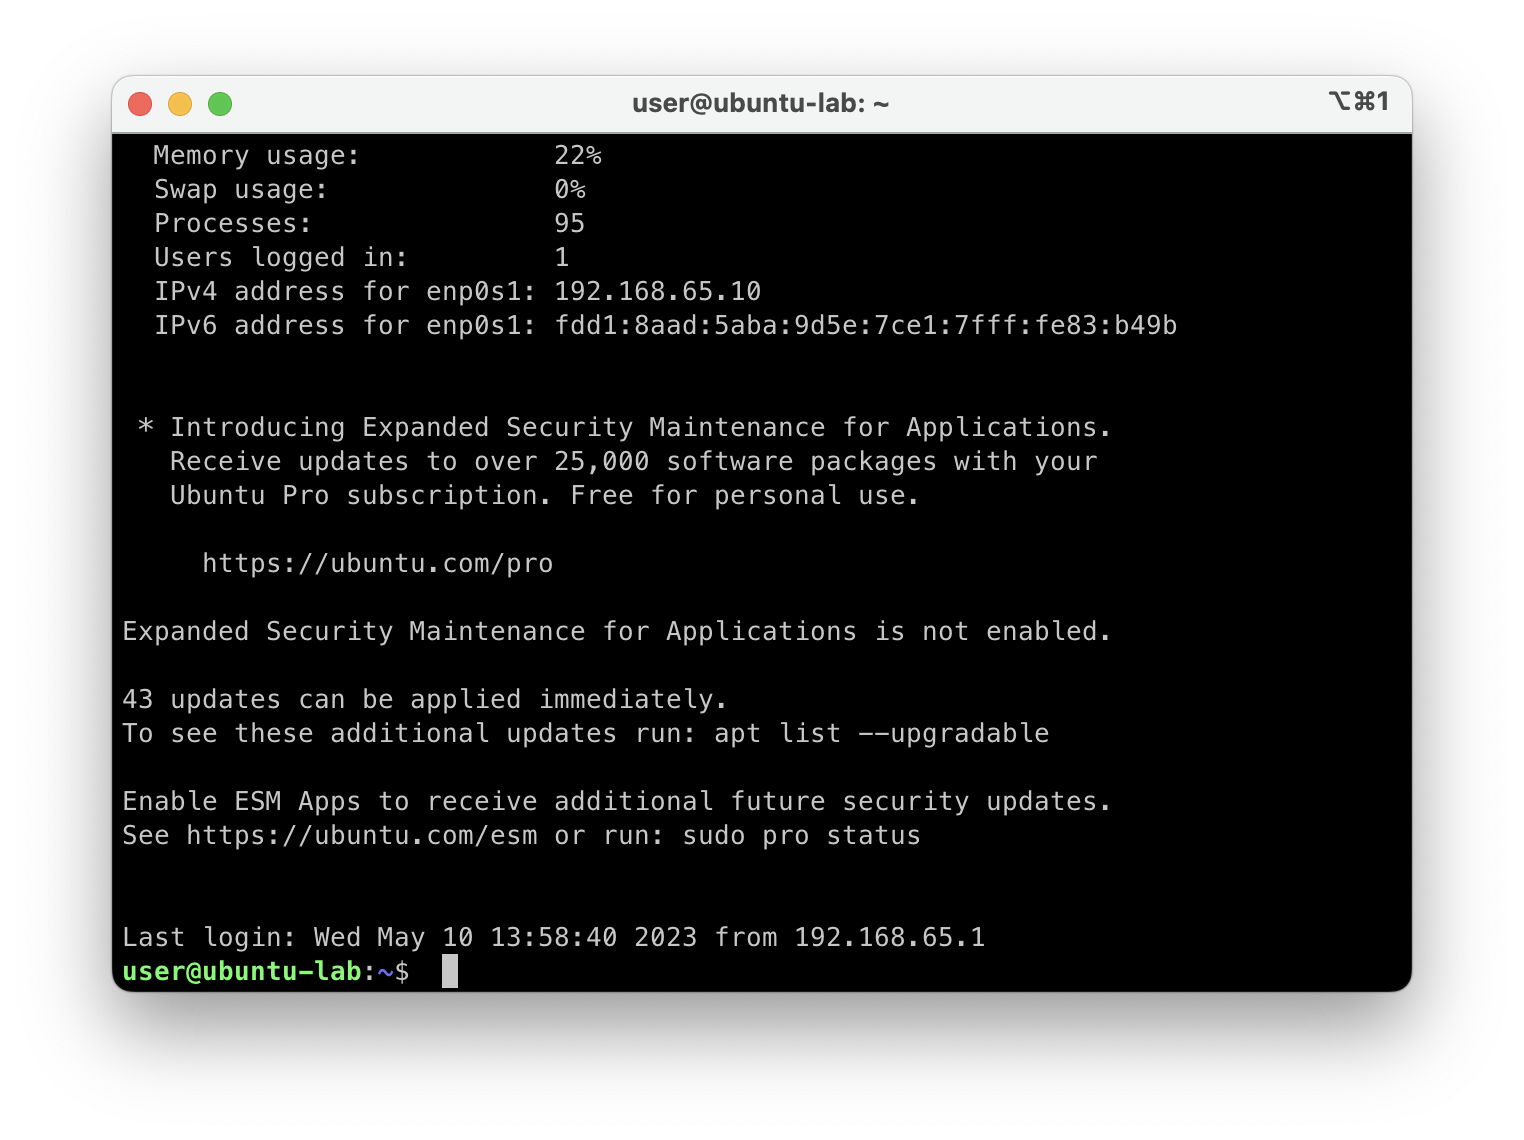
At the command prompt, enter ip a, and take a look at the output.

The entry enp0s1 (or the 1 could be a different number) if your 'virtual' network interface.
Below that, you have MAC address, IPv4 and IPv6 addresses.
We're interested in the IPv4 address.
You can take that, open your MacOS terminal, and SSH into this Virtual Machine. That way you have access to the linux command line, and you'll be able to copy and paste commands.
On the MacOS command line type ssh user@#vm-ip-address# type yes to any fingerprint queries, and enter the password
arm64 linux and sliver.
Okay home stretch.
Linux arm64 doesnt have an x64 to arm64 translation layer like Windows, so you will need the sliver arm64 binary.
(edit, actually you can Apple's Rosetta for Linux VMs if you're on MacOS Ventura, But I haven't tested this.)
Unfortunately the arm64 sliver binary isnt available for download, but it's easy to compile yourself in about 10 mins. It will take ~1.7GB of space on your VM hard disk though, which can be deleted when done.
Alternatively, you can download a version I compiled from here, but I won't be updating this, and download is at your own risk.
- Install mingw-w64, which sliver will need later.
sudo apt-get update
sudo apt-get install mingw-w64
Option 1: Download pre-compiled binary build by me.
cd ~
curl -O https://bpips.co/resource/sliver-linux-arm64-bin.zip
unzip sliver-linux-arm64-bin.zip
cd sliver-linux-arm64-bin
chmod +x ./sliver-server
chmod +x ./sliver-client
sudo cp sliver-server /opt/local/bin/
sudo cp sliver-client /opt/local/bin/
Or
Option 2. Compile From Source:
Following instructions from https://github.com/BishopFox/sliver/wiki/Compile-From-Source
a. Install build requirements
sudo apt-get update
sudo apt-get install golang-go zip make
b. Clone git repo, and compile binary.
cd ~
git clone https://github.com/BishopFox/sliver.git
cd sliver
make
NB. If compilation fails with a message that you require go 1.2, you can install it following instructions here, then run make from the sliver directory again.
c. Check it runs, and that it successfully compiled an ARM64 ELF binary.
file ./sliver-server/
chmod +x ./sliver-server
./sliver-server

d. Install the binary to /usr/local/bin.
sudo cp sliver-server /opt/local/bin/
sudo cp sliver-client /opt/local/bin/
e. You can now uninstall the golang-go package via apt delete the sliver build directory to free up space.
sudo apt-get remove golang-go && sudo apt-get autoremove
rm -rf ~/sliver
rm -rf /usr/local/go // if you installed v1.2 there earlier
Fantastic!
You have just succesfully navigated the process of:
Generating a Windows 11 ARM install ISO.
Creating a Windows 11 arm64 VM in UTM.
Disabling Windows Defender by accessing the registry offline.
Created an Ubuntu Server arm64 vm.
Compiling and installing an arm64 version of sliver-server.
You're ready to go ahead with parts 2-4 of Eric Capurro's guide!
Final Caveats.
Sliver-server can't seem to build payloads for WINDOWS/ARM64 targets, so don't try.
It doesn't seem to matter though, the x64 payloads seem to work just fine for our purposes. I don't think it will have full functionality though.
see https://github.com/BishopFox/sliver/issues/1123
There is a lot of stuff online about networking weirdness in UTM, and in older versions ping didnt work with their virtual network stack. This whole activity involves running two VMs simultaneously and interaction between the two.
Although I was able to replicate strange issues where I could ping one machine from another, and although the other didnt display any evidence of receiving the ping in netstat, it actually did respond to the ping.
However, despite this, the SLIVER implant was able to connect to the CNC linux VM, and I was able to broadly follow the rest of Eric's tutorial series. It all seemed to work fine with "Shared Network" set in UTM settings.
So go forth and have fun!
Creating Windows ISO on MacOS host. See: https://github.com/uup-dump/converter/issues/42#issuecomment-1508932116
DONT try to download a newer version, it will create a functioning ISO with missing OS components.
Unfortunately for newer released of windows, the ISO file needs to be created from a Windows PC, as the build relies on a windows application dism.exe.
If you try to use the MacOS script anyway, you'll get an ISO which works and boots and installs but is has a malfunctioning AppX/MSIX packaging system. And is missing applications like 'Windows Defender'. And you'll spend three days debugging it because you stupidly ignored this big banner on the website website!
 ↩︎ ↩︎
↩︎ ↩︎
